Welcome whirlpool self cleaning oven to the world of hassle-free oven cleaning! If you’re tired of spending hours scrubbing and scraping away at baked-on grime, then a Whirlpool Self Cleaning Oven is your new best friend. Say goodbye to harsh chemicals and tedious elbow grease – this innovative appliance takes care of the hard work for you. In this blog post, we’ll explore the benefits of a self-cleaning oven, guide you through how to use it effectively, share common mistakes to avoid, offer alternative cleaning methods, and provide tips on maintaining and extending the life of your Whirlpool oven. So sit back, relax, and get ready to unlock the full potential of your kitchen with a sparkling clean oven!
Benefits of a Self Cleaning Oven
Benefits of a Self Cleaning Oven
Keeping your oven clean can be a time-consuming and laborious task. That’s where the self-cleaning function on your Whirlpool oven comes to the rescue! This innovative feature offers several benefits that make maintaining a clean and hygienic oven easier than ever before.
One of the main advantages of a self-cleaning oven is its convenience. With just a few simple steps, you can activate the self-cleaning cycle and let the oven do all the work for you. No more scrubbing or using harsh chemicals – simply sit back and relax while your appliance takes care of everything.
In addition to saving you time and effort, a self-cleaning oven also helps ensure food safety. The high temperatures reached during the cleaning process effectively eliminate any bacteria or germs that may have accumulated inside your oven, providing peace of mind when it comes to cooking meals for yourself or your family.
Another benefit worth mentioning is improved energy efficiency. A self-cleaning oven uses advanced technology to burn off residue and grime, which can help enhance heat circulation within the appliance. As a result, your baked goods will cook more evenly and efficiently, potentially reducing cooking times and saving energy in the long run.
Furthermore, having a clean oven not only improves its performance but also extends its lifespan. Regular use of the self-cleaning function prevents grease buildup and reduces the risk of damage caused by clogged vents or heating elements covered in debris. By taking advantage of this feature regularly, you can prolong the life of your Whirlpool oven and avoid costly repairs down the line.
Investing in an appliance with a self-cleaning function is undoubtedly beneficial for any home cook or baking enthusiast. It saves time, promotes food safety, enhances energy efficiency, improves performance,and extends lifespan – making it an essential feature for those looking for convenience without compromising cleanliness.
Step-by-Step Guide on How to Use the Self Cleaning Function
Step-by-Step Guide on How to Use the Self Cleaning Function
Using the self-cleaning function on your Whirlpool oven is a convenient and efficient way to keep it looking spotless. Here’s a step-by-step guide to help you navigate through the process effortlessly.
First, remove all racks and accessories from the oven. This ensures that they won’t be damaged during the high heat cleaning cycle. It’s important not to skip this step as it could lead to unnecessary damage or warping of your precious cookware.
Next, double-check that there are no large food spills or debris inside the oven. You want to make sure any loose crumbs or grime are removed before starting the self-cleaning process.
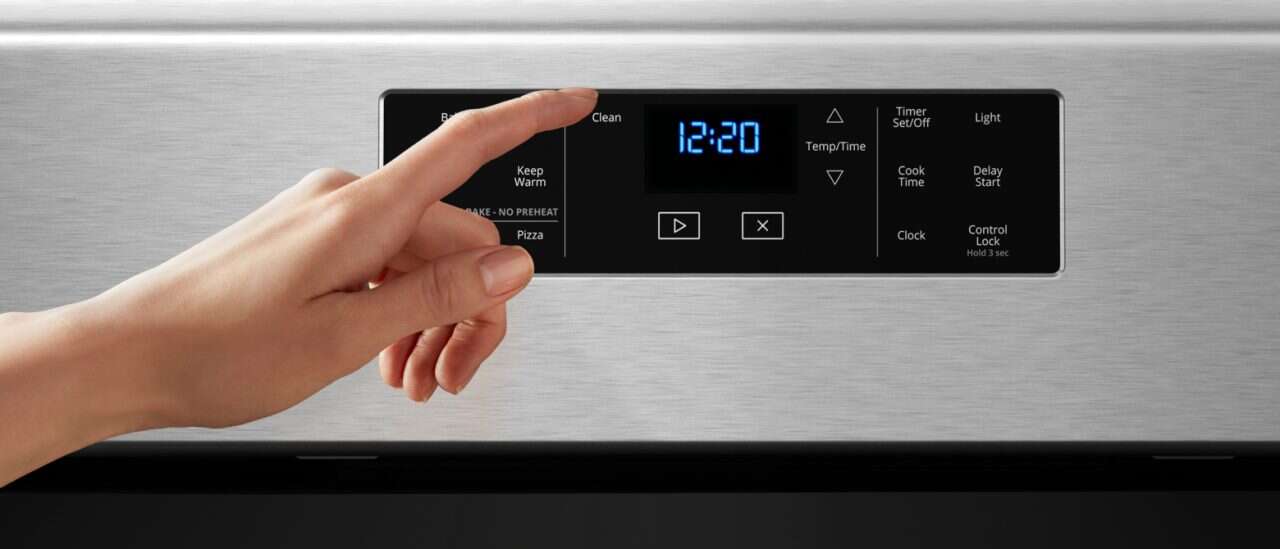
Now, locate and set the self-clean button or option on your Whirlpool oven control panel. Follow any additional prompts specific to your model for setting the cleaning duration and intensity level.
Once you’ve set everything up, sit back and let your Whirlpool oven do its magic! The self-clean cycle usually takes around 2-4 hours, depending on the level of dirtiness in your oven.
During this time, expect some smoke and odor as any leftover residue is burned away. Don’t worry; it’s completely normal! However, it’s recommended to open windows for ventilation during this process.
After completion of the self-cleaning cycle, allow sufficient time for your oven to cool down before attempting to wipe away any residual ash using a damp cloth or sponge.
Remember not to use abrasive cleaners or harsh chemicals when cleaning after self-cleaning mode as these can damage both surfaces and interior functions of your Whirlpool oven!
Following these steps will ensure that you get optimal results from using your Whirlpool self-cleaning function while keeping yourself safe from potential hazards. Now go ahead and enjoy cooking without worrying about tedious scrubbing sessions afterward!
Common Mistakes to Avoid When Using the Self Cleaning Function
Common Mistakes to Avoid When Using the Self Cleaning Function
Using the self cleaning function on your Whirlpool oven can be a great time-saver and make your life easier. However, there are some common mistakes that people often make when using this feature. By avoiding these errors, you can ensure that your oven stays in good working condition and avoid any unnecessary damage.
One of the most common mistakes is leaving racks or other accessories inside the oven during the self cleaning cycle. The extreme heat generated during this process can cause these items to warp or discolor, ruining them in the process. Always remember to remove all racks and accessories before starting the self cleaning function.
Another mistake to avoid is neglecting to clean up spills or food debris before initiating the self cleaning cycle. While it may be tempting to simply rely on the high heat of the self cleaning function to burn away any messes, this can actually lead to more smoke and potentially even set off your smoke detectors! It’s always best practice to wipe up any spills or crumbs before starting a clean cycle.
Additionally, overusing or relying too heavily on the self cleaning function can also be detrimental. While it’s convenient for occasional deep cleans, constantly relying on this feature may shorten its lifespan and put extra strain on its components.
Forgetting about ventilation is another common mistake made by many users. The intense heat produced during a self cleaning cycle needs proper ventilation in order to dissipate effectively. Failing to ensure adequate air circulation could result in overheating issues or even damage sensitive electronic components within your oven.
By being mindful of these common mistakes when using your Whirlpool self-cleaning oven, you’ll ensure that it continues running smoothly for years to come while keeping both you and your kitchen safe from harm!
Alternative Methods for Cleaning Your Whirlpool Oven
Alternative Methods for Cleaning Your Whirlpool Oven
Keeping your Whirlpool self cleaning oven in pristine condition doesn’t always have to involve using the self cleaning function. In fact, there are alternative methods you can try that may suit your needs better or help maintain the longevity of your appliance.
One method is using a mixture of baking soda and vinegar. Create a paste by combining equal parts of baking soda and water, then apply it to the interior surfaces of your oven. Let it sit for several hours or overnight before wiping it clean with a damp cloth or sponge. The combination of baking soda’s abrasive properties and vinegar’s natural degreasing abilities can help remove stubborn stains and grime.
Another option is utilizing steam cleaning techniques. Fill a heatproof dish with water and place it inside your oven. Preheat the oven to its highest temperature setting, allowing the steam to circulate and soften any baked-on residue. Once cooled, wipe away loosened dirt with ease.
For those who prefer natural solutions, lemon juice can be an effective cleaner due to its acidic properties. Squeeze fresh lemon juice onto problem areas such as spills or grease spots, letting it sit for about 10 minutes before scrubbing gently with a soft brush or sponge.
If you’re looking for commercial products specifically designed for oven cleaning, there are plenty available on the market as well. Just make sure to follow the instructions carefully and use them in accordance with safety guidelines.
Remember that regular maintenance is key when caring for your whirlpool oven! By wiping up spills immediately after they occur and regularly performing light cleans between uses, you’ll prevent buildup from becoming too difficult to remove later on.
While utilizing the self cleaning function is convenient, there are alternative methods you can explore when maintaining your Whirlpool oven’s cleanliness. Whether you choose homemade remedies like baking soda and vinegar or opt for commercial cleaners designed specifically for ovens, finding what works best for you will ensure your appliance stays in top shape.
Tips for Maintaining and Extending the Life of Your Whirlpool Oven
Tips for Maintaining and Extending the Life of Your Whirlpool Oven
1. Regular Cleaning: To keep your Whirlpool oven in top shape, make sure to clean it regularly. Wipe down spills and splatters as soon as possible to prevent them from becoming stubborn stains. Use mild detergents or specialized oven cleaners that are safe for your appliance.
2. Avoid Harsh Chemicals: While cleaning your oven, steer clear of harsh chemicals that can damage the interior surfaces. Stick to gentle cleansers specifically designed for ovens, or opt for natural alternatives like baking soda and vinegar.
3. Check Seals and Gaskets: Periodically inspect the seals and gaskets around the oven door to ensure they are intact and free from cracks or tears. Damaged seals can lead to heat loss, uneven cooking, and energy inefficiency.
4. Proper Ventilation: Adequate ventilation is crucial when operating any oven, including a self-cleaning one like Whirlpool’s model. Ensure that the vents at the back of your oven are not blocked by food debris or other items that could hinder airflow.
5. Use Oven-Safe Cookware: When using your Whirlpool oven, always use cookware that is labeled as “oven-safe.” Using inappropriate materials can cause damage to both your cookware and the inside of your appliance.
6. Schedule Professional Maintenance: Consider scheduling regular maintenance with a professional technician who specializes in Whirlpool appliances. They will be able to identify potential issues before they become major problems, ensuring optimal performance and extending the lifespan of your oven.
By following these simple tips, you can maintain a clean and well-functioning Whirlpool self-cleaning oven for years to come! So go ahead, bake those delicious dishes without worrying about unnecessary wear-and-tear on your beloved kitchen companion
Conclusion
Conclusion:
Taking care of your Whirlpool self cleaning oven is essential for its longevity and optimal performance. With the self cleaning function, you can easily maintain a clean oven without the hassle of manual scrubbing. By following the step-by-step guide we provided, you’ll be able to use this feature effectively and safely.
However, it’s important to remember that there are some common mistakes to avoid when using the self cleaning function. Always read and follow the manufacturer’s instructions carefully to prevent any damage or accidents.
If you prefer alternative methods for cleaning your Whirlpool oven, there are many options available such as using baking soda and vinegar or natural cleaners. These methods can be effective in tackling stubborn stains and odors.
In addition to regular cleaning, proper maintenance is crucial for extending the life of your Whirlpool oven. Make sure to perform routine inspections, keep it free from spills and debris, and schedule professional servicing if needed.
With these tips in mind, you can get the most out of your Whirlpool self cleaning oven while ensuring its efficiency and durability over time. So go ahead and enjoy cooking delicious meals knowing that your oven is clean!
Remember: A well-maintained kitchen appliance not only enhances cooking experiences but also adds value to your home!